
Jump to
- Introduction: A Sweet Symphony of Red Velvet and Brownies
- What Makes Red Velvet Brownies So Irresistible?
- Ingredients: What You’ll Need
- Step-by-Step Instructions
- Recipe Highlights
- Tips for Success
- Storage and Toppings
- Customization Ideas
- The Origin of Red Velvet Desserts
- FAQs About Red Velvet Brownies
- Recipe Card
Introduction: A Sweet Symphony of Red Velvet and Brownies
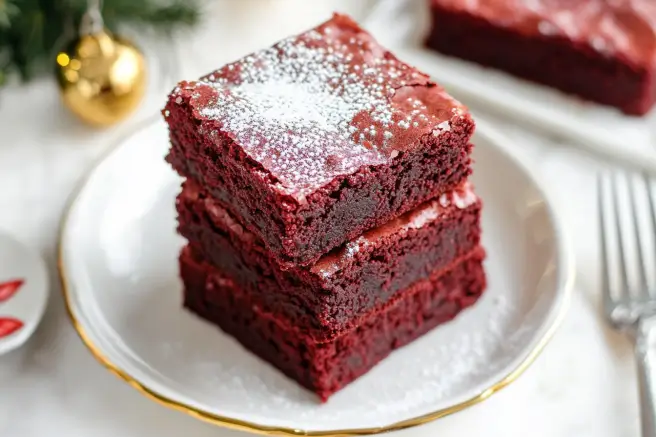
The richness of a fudgy brownie combines perfectly with the tangy charm and vibrant red hue of red velvet cake. This blend offers a balance of flavor and texture that is truly satisfying with every bite. Red velvet brownies are more than just desserts—they’re moments of indulgence that bring deep chocolate flavor, the subtle tang of buttermilk, and a stunning, show-stopping red color that catches the eye. Whether you’re preparing for a romantic dinner, hosting a festive holiday, or simply treating yourself, these brownies are sure to make an impression.
What makes these brownies so beloved? It’s their incredible versatility. They’re perfect for nearly any event, whether as the centerpiece on a Valentine’s Day dessert table or as a festive highlight in your Christmas celebrations. Their bold flavors and bright colors ensure they’re a hit with everyone, from children to adults and even the most selective dessert fans.
For those already in love with red velvet desserts, why not take things further? Try our Red Velvet Cheesecake Brownies Recipe for a creamy, extra-luxurious twist. Or, create a variety of sweets with our Valentine’s Day Dessert Box to share joy and sweetness with friends and family.
Let’s uncover the secrets behind these irresistible brownies and show you how to create them with ease, delivering bakery-quality treats from the comfort of your kitchen.
What Makes Red Velvet Brownies So Irresistible?
Red velvet brownies are not just any dessert—they’re a one-of-a-kind fusion that combines two beloved classics into something truly special. Let’s break down what sets them apart:
A Tangy-Chocolatey Flavor Combo in Red Velvet Brownies
Unlike regular brownies, red velvet brownies stand out because of their unique tangy undertone, which comes from ingredients like vinegar and buttermilk. This gentle tang pairs beautifully with the rich cocoa flavor, creating a taste that feels both bold and perfectly balanced. The result is a dessert that’s not overly sweet but instead offers a delightful mix of chocolate richness and a bright, zesty touch from the buttermilk. Every bite feels like a harmonious blend of flavors that’s impossible to resist.
For an extra indulgent twist, many recipes include a layer of cream cheese frosting or swirls of cheesecake batter. These additions not only amplify the tangy elements but also add a silky, creamy texture that elevates the dessert to a whole new level. Whether you’re a fan of traditional brownies or seeking something a little more luxurious, red velvet brownies deliver a truly special experience.
The Vibrant Red Color of Red Velvet Brownies
The bright red color of these brownies isn’t just pretty—it’s a hallmark of what makes them so special. To achieve this vibrant hue, gel food coloring works best because it’s strong enough to provide consistent color without affecting the texture of the batter. This means your brownies will not only taste incredible but also maintain that classic, smooth consistency that’s key to a great dessert. Beyond the added color, there’s a natural touch too; the reaction between cocoa powder and acidic ingredients like vinegar or buttermilk enhances a subtle reddish tint, giving these brownies their unmistakable look.
Now, picture serving these beauties at an event. Whether it’s a Valentine’s Day dinner or a family holiday gathering, their bold red color makes them the centerpiece of any dessert table. They’re sure to catch everyone’s eye! For a little extra flair, drizzle white chocolate on top or add colorful sprinkles that match the occasion. These small additions not only boost their visual appeal but also make them even more festive and fun to share.
Why Red Velvet Brownies Are Perfect for Celebrations
Red velvet brownies are more than just treats—they’re conversation pieces that bring both flavor and charm to the table. Their unique combination of tangy and chocolatey flavors, paired with vibrant colors, makes them an ideal addition to celebrations of all kinds. Whether it’s a lively birthday bash or a more formal office party, these brownies are sure to fit right in. Furthermore, their eye-catching appearance and rich taste make them a dessert that people will remember long after the event ends. Additionally, the soft, fudgy texture of these brownies ensures that they leave a lasting impression on everyone who tries them. It’s no wonder they often become the highlight of any dessert spread.
Furthermore, these brownies are incredibly versatile, making them suitable for any occasion. Whether you’re serving them as a dessert at a casual get-together or showcasing them as a standout treat during the holidays, they always rise to the occasion. The combination of flavors and their striking appearance ensures that guests will be asking for seconds, and likely thirds!
For more red velvet-themed dessert ideas, make sure to check out our Hershey’s Red Velvet Blossoms Cookies. These bite-sized treats are equally delightful, easy to gift, and perfect for adding variety to your dessert offerings.
Ingredients: What You’ll Need
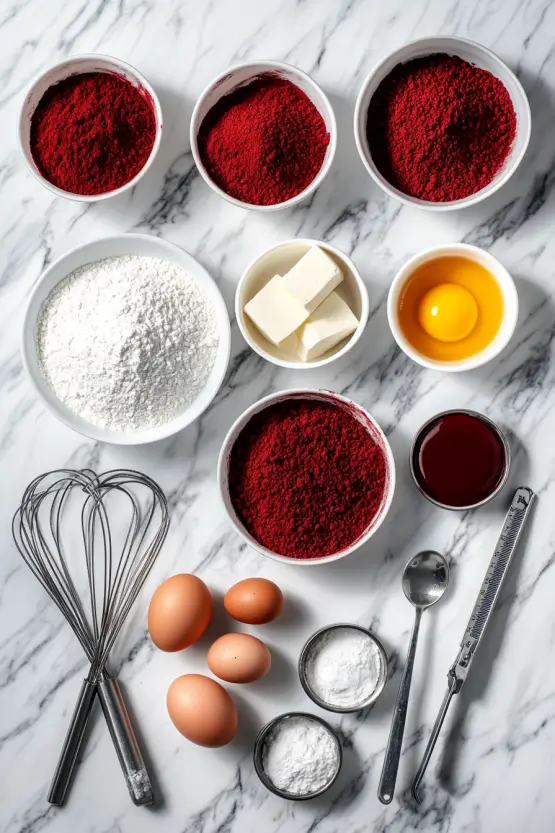
The magic of red velvet brownies lies in their carefully selected ingredients. Here’s a closer look:
Core Ingredients:
- Unsalted Butter: Adds richness and keeps the texture moist.
- Granulated Sugar: Sweetens the brownies and contributes to that signature crinkle top.
- Eggs: Provide structure and help create a fudgy texture.
- Vanilla Extract: Enhances the overall flavor profile.
- Gel Food Coloring: For a vibrant and consistent red color without altering the batter’s texture.
- Cocoa Powder: A mild chocolate base that balances the tangy notes.
- All-Purpose Flour: Forms the foundation of the brownie’s structure.
- Salt: Enhances flavors and balances sweetness.
- Vinegar: Key to achieving the tangy red velvet flavor and activating the cocoa.
Optional Mix-Ins:
- White Chocolate Chips: Add a sweet contrast.
- Chopped Pecans or Walnuts: Introduce a crunchy texture and nutty flavor.
Substitutions:
- Swap buttermilk with Greek yogurt or sour cream for a similar tang.
- Replace synthetic food coloring with natural dyes like beetroot powder for a healthier option.
Step-by-Step Instructions
Preparation:
- Preheat the Oven: Set it to 350°F (175°C).
- Prepare the Pan: Line an 8×8-inch baking pan with parchment paper to ensure easy removal and clean edges.
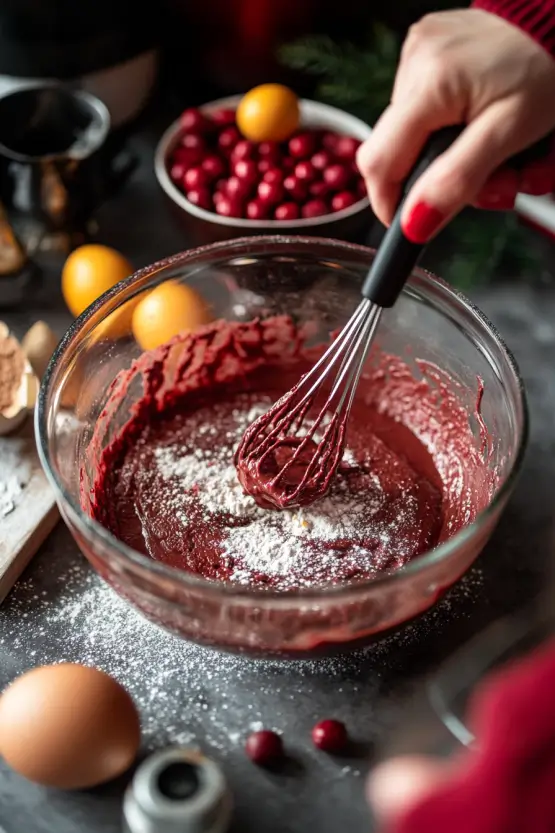
Making the Batter:
- Melt Butter: Use a microwave-safe bowl to melt unsalted butter until smooth.
- Mix Wet Ingredients: Whisk the melted butter with granulated sugar, eggs, vanilla extract, and gel food coloring until fully combined.
- Combine Dry Ingredients: In a separate bowl, sift together cocoa powder, all-purpose flour, and salt.
- Bring It All Together: Gradually fold the dry mixture into the wet ingredients. Mix gently to avoid overworking the batter, which can affect the texture.
Optional Cheesecake Swirl:
- Beat cream cheese, sugar, egg, and vanilla extract until smooth. Drop dollops of this mixture onto the brownie batter and use a knife to create a marbled effect.
Baking:
- Transfer to Pan: Pour the batter into the prepared pan, spreading it evenly.
- Bake: Place the pan in the oven and bake for 30-35 minutes. Test doneness by inserting a toothpick; it should come out with moist crumbs.
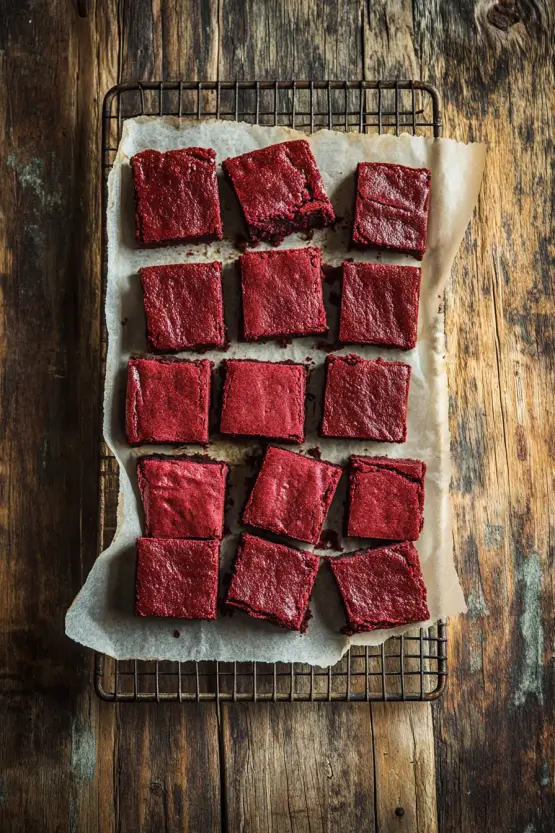
- Cool: Let the brownies cool completely before slicing into squares.
Recipe Highlights
What makes these brownies so irresistible?
- Fudgy Texture: The perfect balance of gooey and chewy.
- Classic Red Velvet Flavor: Tangy, chocolatey, and indulgent.
- Simple Preparation: Easy enough for beginners yet impressive enough to wow guests.
Tips for Success
- Room-Temperature Ingredients: Helps ensure smooth mixing and better texture.
- Use Gel Food Coloring: Produces a vibrant red without altering the batter’s consistency.
- Avoid Overmixing: Keeps the texture soft and fudgy.
- Test for Doneness: Look for moist crumbs on a toothpick rather than wet batter.
Storage and Toppings
Storage Options:
- Room Temperature: Keep in an airtight container for up to 2 days. Wrap individual brownies in plastic wrap or foil to lock in moisture.
- Refrigerator: Store for up to a week. Allow the brownies to warm slightly before serving for the best texture.
- Freezer: Wrap each brownie individually and store in a freezer-safe bag for up to 3 months. Thaw at room temperature or warm briefly before serving.
Topping Ideas:
- Cream Cheese Frosting: Adds a tangy, luxurious layer.
- Drizzled Chocolate: Use melted white or dark chocolate for extra richness.
- Festive Decorations: Heart-shaped candies or sprinkles add a fun, festive touch.
Customization Ideas
Take your red velvet brownies to the next level by adding creative twists and flavors:
- Mix-Ins: To add more texture and flavor, consider mixing in chocolate chips, nuts, or dried fruit. For example, white chocolate chips can provide a creamy contrast, while chopped pecans or walnuts add a satisfying crunch.
- Flavor Swirls: For a fun and unique twist, swirl caramel, peanut butter, or Nutella into the batter. Not only does this create an eye-catching marbled design, but it also adds bursts of flavor in every bite.
- Crushed Oreos: If you love the combination of cookies and cream, try folding crushed Oreos into the batter or sprinkling them generously on top. This addition enhances both the flavor and the texture, making the brownies even more indulgent.
Each of these ideas allows you to personalize your brownies, ensuring they stand out and delight anyone who tries them.
The Origin of Red Velvet Desserts
The history of red velvet is as rich as its flavor and full of intriguing twists. It dates back to the 19th century when “velvet” cakes were highly prized for their luxurious soft and fine crumb. These cakes stood out as a symbol of sophistication and indulgence, gracing tables at special events and high-society gatherings. Initially, the reddish tint was not achieved through artificial means but came naturally from the reaction between cocoa powder and acidic ingredients like buttermilk and vinegar, which brought out subtle reddish tones in the cocoa.
By the early 20th century, red velvet cakes began to evolve further, especially with the rise of food science and the introduction of food coloring. During the 1920s and 1930s, bakers started adding red dye to enhance the hue, making the cakes more visually striking and perfect for festive occasions. This bold coloring soon became a defining feature of the dessert, capturing the attention of bakers and dessert lovers alike.
The mid-20th century saw red velvet gain widespread popularity, especially as boxed cake mixes made baking simpler and more accessible to households across America. Consequently, this once-special dessert became a staple for everyday celebrations. Moreover, the convenience of ready-made mixes allowed more people to enjoy the flavors of red velvet without the need for advanced baking skills, further cementing its place in American kitchens. Suddenly, what was once a luxury became a beloved dessert staple for birthdays, holidays, and everything in between. Today, red velvet has transformed into a cultural icon, inspiring countless variations like cupcakes, cheesecakes, and brownies while maintaining its nostalgic charm and irresistible appeal.
FAQs About Red Velvet Brownies
Red velvet brownies stand out because of their tangy flavor, vibrant red color, and the subtle addition of cocoa powder. This unique combination creates a dessert that is both rich and slightly tangy, making it distinct from traditional brownies.
Yes, you can use natural alternatives like beetroot powder or pomegranate juice to achieve a reddish hue. However, the color might be less vibrant compared to using gel food coloring.
Store them in an airtight container at room temperature for up to 2 days. For longer storage, refrigerate for up to a week or freeze them for up to 3 months.
Absolutely! Cream cheese frosting is a classic pairing with red velvet desserts. You can spread it on top of the cooled brownies or use it as a swirl in the batter before baking.
Yes, you can substitute the all-purpose flour with a gluten-free flour blend. Ensure that the blend is suitable for baking to maintain the desired texture.
Recipe Card
Red Velvet Brownies
- Prep Time: 15 minutes
- Cook Time: 30-35 minutes
- Servings: 12 brownies
Ingredients:
- 1/2 cup unsalted butter
- 1 cup granulated sugar
- 2 large eggs
- 1 tsp vanilla extract
- 1 tbsp gel food coloring
- 2 tbsp cocoa powder
- 3/4 cup all-purpose flour
- 1/4 tsp salt
Instructions:
- Preheat oven to 350°F. Line an 8×8-inch pan with parchment paper.
- Melt butter and mix with sugar, eggs, vanilla, and food coloring.
- Sift together cocoa powder, flour, and salt. Fold into wet ingredients.
- Pour batter into pan and bake for 30-35 minutes.
- Cool before slicing and enjoy!
Ready to give these brownies a try? Share your creations on social media and tag us for a chance to be featured! For another vibrant treat, check out our Pink Velvet Cookies Recipe.