
Jump to
- Why You’ll Love This Red Velvet Oreo Cheesecake Recipe
- Ingredients for the Red Velvet Oreo Cheesecake
- Steps to Make the Perfect Red Velvet Oreo Cheesecake
- Baking Guidelines to Perfect Your Red Velvet Oreo Cheesecake
- Storage Tips for Red Velvet Oreo Cheesecake
- Expert Tips for Red Velvet Oreo Cheesecake Success
- FAQs About Red Velvet Oreo Cheesecake
- Recipe Summary and Notes
If you’ve ever dreamed of combining the decadence of red velvet, the creaminess of cheesecake, and the irresistible crunch of Oreo cookies, then this recipe is for you! Imagine biting into a dessert that perfectly balances the tangy richness of cheesecake with the moist, cocoa-infused charm of red velvet cake—all set atop a buttery, chocolatey Oreo crust. Whether it’s for holidays, birthdays, or just an excuse to treat yourself, this Red Velvet Oreo Cheesecake is a dessert masterpiece that’s sure to impress your family and friends.
The best part? It’s not as complicated as it looks. With a little bit of preparation and some helpful tips (we’ve got you covered), you’ll be able to whip up this show-stopping dessert in no time. Plus, it’s incredibly versatile—perfect for adding your own creative touches. Let’s dive into this recipe that’s guaranteed to bring smiles and a whole lot of “Wow” moments to your table!
Why You’ll Love This Red Velvet Oreo Cheesecake Recipe
1. A Stunning Dessert with Layers of Flavor
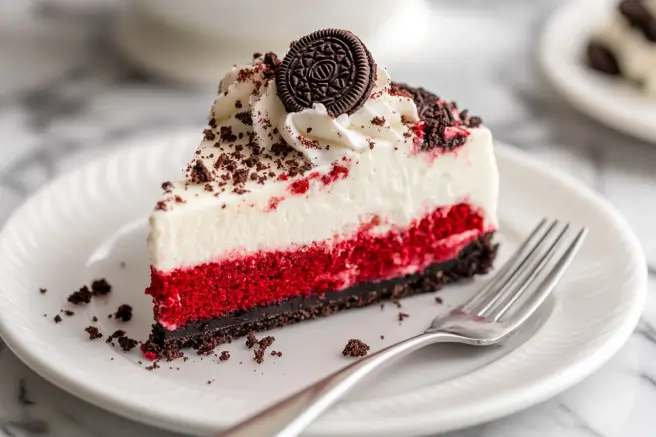
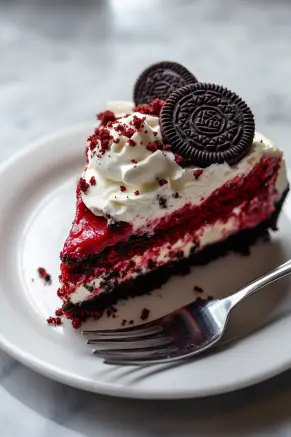
Picture this: a buttery Oreo crust that crumbles just right with every bite, topped with a moist and vibrantly red velvet cake layer, and crowned with a luscious, creamy cheesecake topping. The final touch? A delightful scattering of crushed Oreos and delicate red velvet crumbs that not only add texture but also give this dessert its picture-perfect finish. It’s a symphony of flavors and textures that’s as irresistible as it is visually stunning. Serve it at your next gathering, and watch as eyes light up with excitement!
2. Perfect for Special Occasions
This dessert isn’t just a treat—it’s a statement piece. Whether you’re celebrating a birthday, hosting a festive holiday party, or commemorating a milestone anniversary, the Red Velvet Oreo Cheesecake is the kind of dessert that makes the occasion feel extra special. Its bold red hue is not only festive but also incredibly photogenic, making it perfect for those social media-worthy moments. The flavor combination is so rich and indulgent, it’s guaranteed to leave your guests talking long after the plates are cleared.
3. Fun and Easy to Customize
Love a dessert that you can make your own? This cheesecake is a perfect blank canvas for creativity. Craving a little extra crunch? Pile on more crushed Oreos. Looking for a tangy twist? Drizzle cream cheese glaze over the top, or even add a hint of citrus to the cheesecake layer for a refreshing balance. Feeling adventurous? Experiment with toppings like white chocolate shavings, edible flowers, or even a sprinkle of gold dust for an upscale touch. This recipe is not just about following steps—it’s about making something uniquely yours.
For more festive dessert ideas and creative inspiration, don’t miss Holiday Desserts with a Twist.
Ingredients for the Red Velvet Oreo Cheesecake
Oreo Crust for the Red Velvet Oreo Cheesecake
- 24 Oreo cookies, finely crushed
- 5 tablespoons unsalted butter, melted
Red Velvet Cake Layer for the Cheesecake
- 1 ¼ cups all-purpose flour
- 2 tablespoons cocoa powder
- ½ teaspoon baking powder
- ½ teaspoon baking soda
- ¼ teaspoon salt
- ½ cup unsalted butter, softened
- 1 cup granulated sugar
- 2 large eggs
- ½ cup buttermilk
- 1 teaspoon vanilla extract
- 1 teaspoon distilled white vinegar
- 1 tablespoon red food coloring
Cheesecake Layer for the Red Velvet Oreo Dessert
- 16 oz cream cheese, softened
- ¾ cup granulated sugar
- 3 large eggs
- 1 teaspoon vanilla extract
- ½ cup sour cream
Toppings
- Crushed Oreos or Oreo halves
- Reserved red velvet cake crumbs
- Whipped cream (optional)
- Optional: Red velvet glaze
Steps to Make the Perfect Red Velvet Oreo Cheesecake
1: Prepare the Oreo Crust for Red Velvet Cheesecake
- Preheat your oven to 325°F (163°C).
- Combine the crushed Oreo cookies and melted butter in a mixing bowl until the mixture resembles wet sand.
- Press the mixture firmly into the bottom of a 9-inch springform pan. Use the back of a spoon or the bottom of a glass to ensure an even layer.
- Bake for 10 minutes, then let the crust cool completely.
2: Make the Red Velvet Cake Layer for Cheesecake
- Sift the Dry Ingredients: In a large bowl, sift together the flour, cocoa powder, baking powder, baking soda, and salt. Set aside.
- Cream Butter and Sugar: Using a hand or stand mixer, beat the butter and sugar until light and fluffy. Add the eggs one at a time, mixing well after each addition.
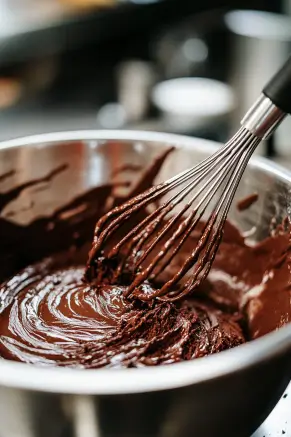
- Combine Wet Ingredients: In a separate bowl, whisk together the buttermilk, vanilla extract, vinegar, and red food coloring.
- Mix the Batter: Gradually add the dry ingredients to the creamed mixture, alternating with the wet ingredients. Mix until just combined.
- Bake the Cake: Pour the batter into a greased 9-inch round cake pan. Bake at 350°F (177°C) for 25-30 minutes, or until a toothpick inserted into the center comes out clean. Allow the cake to cool completely before trimming the top for an even layer.
3: Prepare the Cheesecake Layer for Red Velvet Dessert
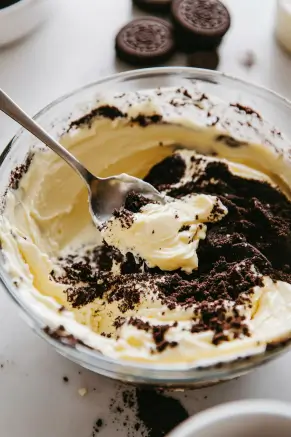
- Cream the Ingredients: In a large bowl, beat the cream cheese and sugar until smooth and creamy.
- Add Eggs and Flavoring: Add the eggs one at a time, mixing on low speed to avoid incorporating too much air. Stir in the vanilla extract and sour cream until just combined.
- Avoid overmixing to maintain a dense and creamy cheesecake texture.
4: Assemble and Bake the Red Velvet Oreo Cheesecake
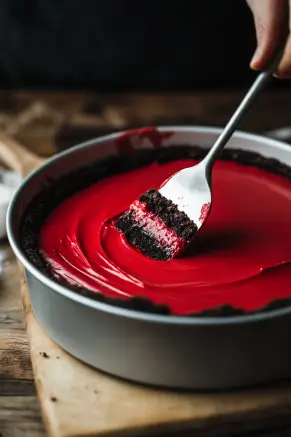
- Layer the Ingredients: Place the cooled Oreo crust layer in the springform pan. Add the trimmed red velvet cake layer on top. Pour the cheesecake batter over the red velvet cake, smoothing the surface with a spatula.
- Bake in a Water Bath: Wrap the outside of the springform pan with aluminum foil to prevent leaks. Place the pan in a larger baking dish and fill the dish with hot water halfway up the sides of the springform pan.
- Bake Gradually: Bake at 325°F (163°C) for 45-50 minutes, or until the edges are set and the center is slightly jiggly. Turn off the oven and leave the cheesecake inside for 1 hour to cool gradually.
5: Chill and Decorate Your Red Velvet Oreo Cheesecake
- Refrigerate the cheesecake for at least 6 hours or overnight for the best texture and flavor.
- Before serving, decorate with crushed Oreos, red velvet crumbs, whipped cream, or a drizzle of red velvet glaze for a stunning finish.
Baking Guidelines to Perfect Your Red Velvet Oreo Cheesecake
- Timing Tips: Bake the crust for 10 minutes, ensuring it sets firmly without becoming overly crispy. Bake the red velvet cake layer for 25 minutes, or until a toothpick inserted into the center comes out clean. For the cheesecake, a baking time of 45 minutes will yield a perfectly creamy texture, with the edges set and the center slightly jiggly.
- Prevent Cracks: Always use a water bath when baking cheesecake to maintain a humid environment, which helps prevent cracks. Wrap the outside of your springform pan with aluminum foil to keep water from seeping into the crust. Additionally, avoid opening the oven door during baking as sudden changes in temperature can cause the cheesecake to crack.
- Cooling Advice: Let the cheesecake cool gradually for the best results. After turning off the oven, leave the cheesecake inside with the door slightly ajar for about an hour to allow a gentle cooling process. This prevents it from sinking or cracking. Once out of the oven, let it come to room temperature before refrigerating for at least 6 hours or overnight for optimal texture and flavor.
Storage Tips for Red Velvet Oreo Cheesecake
- Refrigeration: To keep your cheesecake fresh and flavorful, store it in an airtight container in the refrigerator. This will help maintain its creamy texture for up to 5 days. Be sure to cover it well to prevent it from absorbing any unwanted odors from other foods.
- Freezing: For longer storage, slice the cheesecake into individual portions. Wrap each slice tightly in plastic wrap, then place them in a freezer-safe container or resealable freezer bag. This method will keep the cheesecake fresh for up to 3 months. When you’re ready to enjoy a slice, transfer it to the fridge to thaw overnight. For the best texture, avoid thawing it at room temperature as this can cause condensation and alter the texture.
Expert Tips for Red Velvet Oreo Cheesecake Success
- Room-Temperature Ingredients: Use softened cream cheese and room-temperature eggs to ensure a smooth batter. Cold ingredients can lead to a lumpy mixture, so let everything sit at room temperature for at least 30 minutes before you begin. This simple step will help you achieve that luxurious, creamy texture.
- Trim for Even Layers: Use a serrated knife to trim the red velvet cake layer for a polished look. This ensures the layers stack neatly, giving the cheesecake a professional appearance. If you’re new to trimming, freeze the cake briefly for easier handling.
- Customize Your Toppings: Add white chocolate curls, fresh berries, or a drizzle of caramel for a unique twist. Feeling festive? Sprinkle edible glitter or holiday-themed sprinkles on top. Want more crunch? Toss on some crushed pretzels or nuts for contrast. The options are endless, so feel free to get creative and make it your own!
FAQs About Red Velvet Oreo Cheesecake
Yes! In fact, it’s best to prepare it a day ahead to allow the flavors to meld and the texture to firm up.
Natural alternatives like beet juice or a few drops of raspberry puree can give your cake a vibrant hue.
Absolutely. Graham cracker crust or even a pretzel crust would work beautifully for this recipe.
Always bake the cheesecake in a water bath and avoid overmixing the batter.
Recipe Summary and Notes
- Prep Time: 30 minutes
- Cook Time: 1 hour 30 minutes (including cooling)
- Total Time: 8 hours (with chilling)
- Servings: 10-12 slices
This Red Velvet Oreo Cheesecake Recipe combines bold flavors, creamy textures, and a festive appearance. It’s the ultimate dessert for special occasions or any day you want to treat yourself. For more inspiration, explore Easy Puff Pastry Dessert Ideas and Red Velvet Cheesecake Brownies. Enjoy every bite!